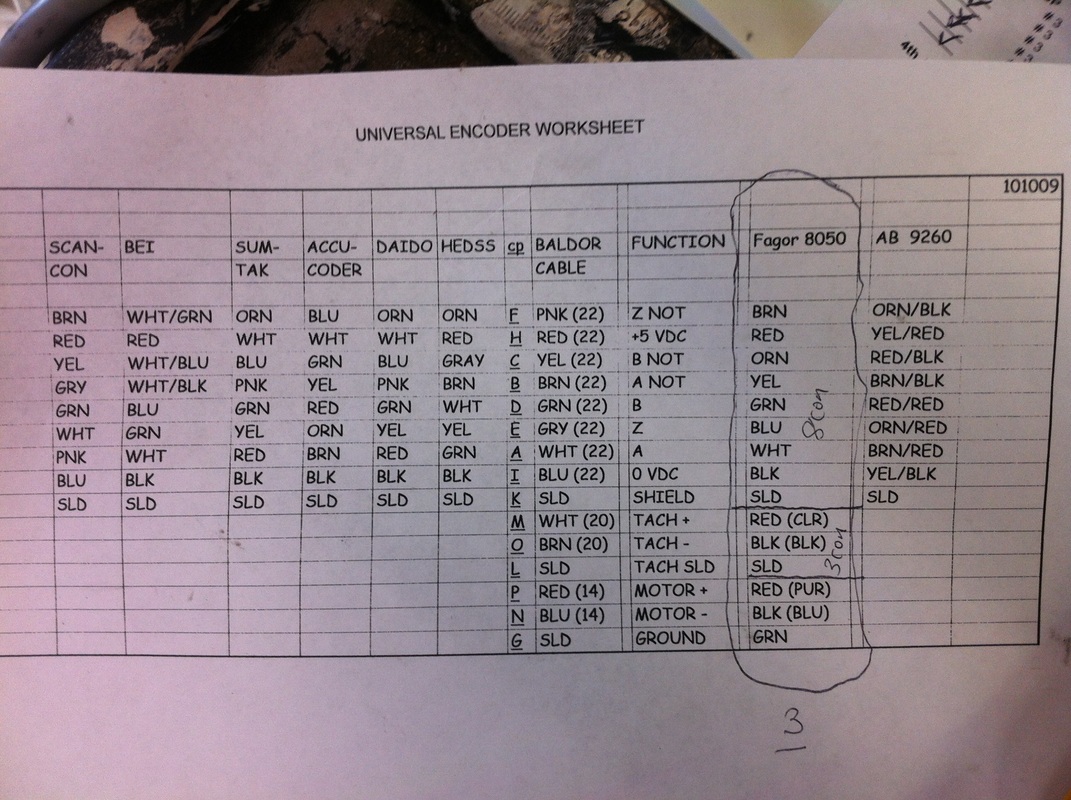
This week in the parts dept. I was given the nifty task of wiring different sections of the old scrap router. As you can see, the Fagor 8000 column is circled on the paper. Fagor is a company that (to my knowledge) sends parts in to the parts dept. for repairs, just like the other clients. This wiring pattern under the Fagor 8000 column connects to a specific part on the router. In fact, each column on the paper connects to a different section! 10 wiring jobs in total.
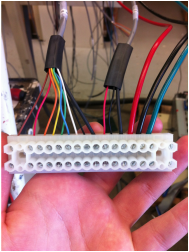
After about an hour of getting to grips with the basics of wiring, this is the final product.
I had to cut, strip, position, and clamp down each individual wire that leads into the white component (I still don't know what it's called)! Quite the gruesome labor, as I ended up chafing the sides of my thumb and forefinger whilst twisting the wire.
I had to cut, strip, position, and clamp down each individual wire that leads into the white component (I still don't know what it's called)! Quite the gruesome labor, as I ended up chafing the sides of my thumb and forefinger whilst twisting the wire.
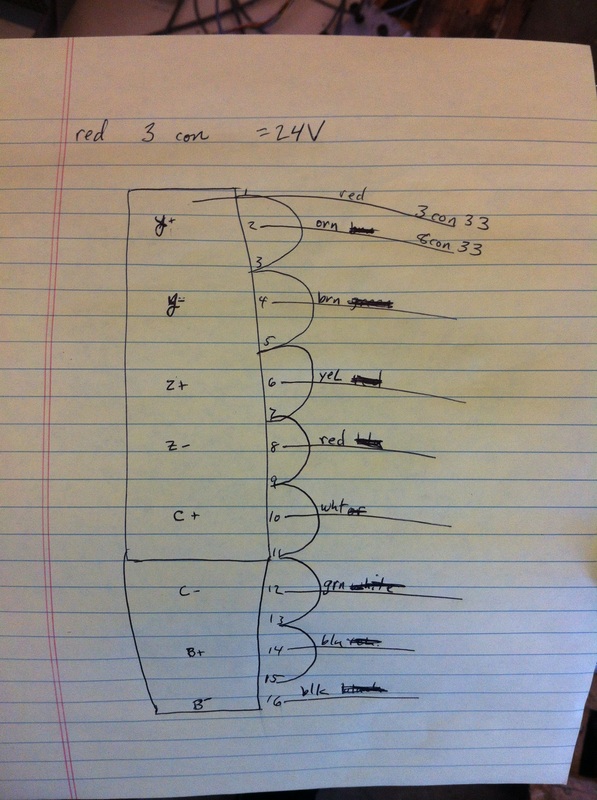
These wiring jobs were great sources of learning and anxiety. This piece of paper details how I should wire my next section. In addition, this wiring job required that I had to loop a red wire back through every other hole. In every other hole(offset from the red wire), a different colored wire is supposed to be placed. Notice that this is fairly similar to the universal decoder worksheet above.
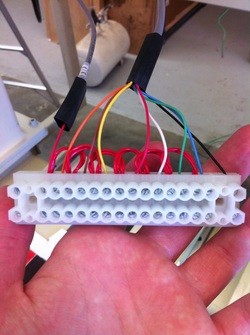
After a day of "action packed" wiring, this is the final product. As you can see, the wires are organized in a similar fashion as the other picture. This is because there is a universal code- a mantra- for engineers, relating to wire order. BRN, RED, ORN, YEL, GRN, BLU, WHT, BLK, S=LD.
Of course, it will differ with each and every item you particularly decide to wire. In this case, the BRN wire is switched with the RED wire. The SLD mentioned above stands for shield. The SLD wire is wrapped around the other wires, encased in a special foil. The purpose of the SLD is to shield the other wires from sound; as sound can damage and interfere with signal.
Of course, it will differ with each and every item you particularly decide to wire. In this case, the BRN wire is switched with the RED wire. The SLD mentioned above stands for shield. The SLD wire is wrapped around the other wires, encased in a special foil. The purpose of the SLD is to shield the other wires from sound; as sound can damage and interfere with signal.
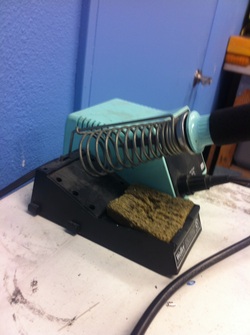
Siale is my "afternoon mentor". After everyone starts shuffling out of the office in the afternoon, I usually find my way into Siale's office. In these last hours of the workday, I help Siale with a new project and I learn new skills because of it. This week, I worked with the soldering iron to rebuild small battery packs. More about this task can be read below.
The process of rebuilding battery packs is a simple one. I begin by unscrewing two screws from the battery pack box. Next, I pull the circuit board out of the box. I use needle-nose pliers to rip off hot glue- this was holding the inoperative battery in place. Thirdly, I cut the soldering that was holding the inoperative battery in place, and begin removing the solder. This process is particularly annoying.
Next, I place the new battery on the circuit board, and solder it into place. I affix the battery pack box onto the circuit board and screw the screws back into their respective holes.
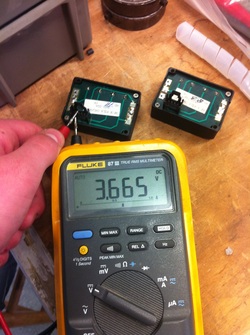
The reconstruction process is nearly complete. In the final step, I use a multimeter to test whether the battery pack outputs the correct voltage. I turn on the multimeter by turning the dial to V(with an M shape hovering above) to select volts. Placing the red(+) test lead on the farthest left pin, and the black(-) test lead on the next pin to the right will give me the correct current. The batteries are supposed to output 36.6 volts. As you can see, the multimeter is displaying the correct amount of voltage. The procedure is complete.
Next, I place the new battery on the circuit board, and solder it into place. I affix the battery pack box onto the circuit board and screw the screws back into their respective holes.
The reconstruction process is nearly complete. In the final step, I use a multimeter to test whether the battery pack outputs the correct voltage. I turn on the multimeter by turning the dial to V(with an M shape hovering above) to select volts. Placing the red(+) test lead on the farthest left pin, and the black(-) test lead on the next pin to the right will give me the correct current. The batteries are supposed to output 36.6 volts. As you can see, the multimeter is displaying the correct amount of voltage. The procedure is complete.
